Saturday, March 22, 2014

The Signature Block Conundrum

A pretty face will always grow old. A nice body will always change with age. However, a good woman will always be a good woman. –Unknown

The other week, I had the day off of work. It was a Friday and I was happy to start the weekend early. My plan was to meet up with my mom in the big city and enjoy some quality time together while the Not-So-Little Bugs were in school. Unfortunately, LadyBug was sick. So, instead I stayed home with her. I decided that while I had some "extra" time on my hands, I'd do a little on-line shopping for fabric for a semi-special project.

The story goes like this: there is this cutest little old lady in my ward {congregation} who is 99½ years old and still sharp as a tack. Although she can no longer see well enough to drive and she's getting a little frail, she still lives alone in her own home, takes care of herself and spreads happiness wherever she goes. As a matter of fact, last fall she asked if Grasshopper would come over and rake up her leaves. By the time we got to her house the next afternoon, she's already gotten the leaf blower out and blown them into a gigantic pile in the back yard. All we had to do was bag them for her.

I have really enjoyed getting to know her over the last nine or ten years. She is truly an amazing woman. Ever since she turned 99, last September, I've been thinking about making her a signature quilt with, wait for it . . . 100 signature blocks. I'm sure that the people she knows and has influenced could fill about 10 hundred-block quilts, so I'm thinking that all the members of a single family could have one block to sign, and we could keep it to a single quilt at a manageable size.

I've always wanted to do something with 1930's reproduction fabrics, and this seemed like the perfect project. This sweet lady would have been 16 in 1930. I want to do something really scrappy. Keepsake Quilting sells 10" pre-cuts in a variety pack of 1930's prints. Several months ago, thinking of this project, I searched the interwebs for signature block quilts and one particular layout that creates a lattice stuck in my brain, but I wanted to have a plan before I ordered fabric so that I could make sure that I liked the layout and that I ordered enough fabric. I started doodling around with the old {Microsoft} Paint box. {This took me forever. Perhaps EQ should be on my Christmas wish list.}

Lattice Layout

I like the looks of this layout. It is made with the simple block below, which I found on-line. When I went back to my original pencil-and-paper doodle on graph paper from several months ago, which was based on allowing for pre-washing of the pre-cuts and then using the maximum amount of fabric with the least amount of waste to get the biggest block possible, I discovered that the white signature area of the block I drew up was bigger than the one below by about ⅞", which would make the white lattice bigger and the scrappy 1930's reproduction fabrics smaller than in the layout above. I'm not sure if that would be too much white lattice and not enough 1930's reproduction fabrics.


While I was doodling, I decided to try out another layout I'd seen in my previous search. I don't like it as much as the first layout, but maybe with larger white signature areas, I'd like it better.

Diamond Layout

While I was thinking and doodling and searching the interwebs for a refresher on the two layouts above, I found this block.


If the block is turned the right way, it makes pretty flowers. I really like the way this looks, but it leaves the least amount of room for a signature. And a pre-washed {a.k.a. pre-shrunk} 10" square could not comfortably make four 5" blocks. I don't think a 10" block that hasn't been pre-washed could do it. I'd need to take a different approach to getting a variety of fabrics with enough of each fabric to make all four blocks for each flower. On the plus side, the signature area is completely finished and there won't be a problem with people signing into the seam allowances.

Flower Layout

My original plan was to do 5" blocks. That makes a 50" square quilt with either the lattice or the diamond layouts, before borders. The flower quilt has 2" sashings, which makes it 62" square before borders. If I bump it to 6" blocks, that pretty much takes using 10" pre-cuts off the table for all of the layouts. The top two layouts would be 60" before borders and the flower layout would be 75" square {I think I'd increase the sashings to 2½" to maintain the same ratio} before borders, which is pretty huge for a lap quilt. If I was going to go big, then I'd do 7" blocks, and with 2¾" sashings, it would be 86½". Slap on some borders and you've got yourself a queen-size quilt. Which really wasn't my plan.

If I'm going to do this, I'd better get a move on. I've only got six months. In the weeks since I doodled these out, I'd almost decided to go with the flower layout. Looking at them again now, I'm kind of back to liking the lattice layout. I've always like the diamond layout least of all, so at least there's one thing I can rule out.

There are pros and cons to every layout and every block size. Ruling things out further, I think that I will stick with 5" blocks to keep the quilt size in check. I'll probably have to find a nice magnifying glass to give with the quilt so this little old lady, whose eyesight is very poor, can read her own signature quilt. In the cons column for the lattice layout, as previously mentioned, the strip of white fabric will be bigger than pictured so I'm worried that will overpower the quilt. Not previously mentioned, I'm also worried about people signing into the seam allowances, even if I provide clear instructions. I've considered using a Frixion pen to mark the boundaries, but you never know. In the cons column for the flower layout, the signature area is tiny in a 5" block. And it will have to be paper pieced in order to come out right at 5".

If you've got an opinion, please share! It always helps me to decide what I want when I hear from other people. Right now, I'm on the fence between the lattice layout and the flower layout. Vote for your favorite in the comments.

Friday, March 21, 2014

Swinging On A Star

Would you like to swing on a star?
Carry moonbeams home in a jar
And be better off than you are
Or would you rather be a . . .

Swinging On A Star
Music by Jimmy Van Heusen, lyrics by Johnny Burke

One of the girls I work with is expecting a baby boy in a couple of weeks here. I was invited to her shower with a pretty good amount of lead time, so I decided to make a quilt. I had a panel that I bought about 4 years ago out of an all-you-can-stuff-in-a-bag-for-$5 bin. A tiny bit of the outside border had been nicked in the cutting process and I figured it would be a good quilt to practice free-motion on, and then maybe donate. I didn't have enough time to get a quilt pieced for the shower, so I used the panel plus fabric from my stash to make her a quilt.

As I mentioned, I bought the panel to practice FMQ. I outlined all the little bears in the center, plus the lines in the main borders of the design, which was good free-motion practice at following a line. But I specifically had stars and loops in mind for practice. And practice them I did. I did the blue borders on the left and right of the panel first and thought, "huh. Those didn't come out too badly." Then I did the green border with the stars on it in the panel and those loops and stars were decidedly better. Then I filled in the center of the panel {which may have been overkill, but it's done now} and when I got to the outer border, which is flannel I ordered on-line by mistake because it was on clearance but works perfectly in this quilt, I'd pretty much figured out how to keep the loops looking like loops. I'm still really slow, though, because when I come to a star, I have to think about where I want to end up and then go in the opposite direction.

In my blog travels I've seen a number of people who, when they finish a project, list out how many yards of fabric came out of their stash {and if they added any back in to stash}. I always find it interesting. Everything on this quilt came out of my stash {I love it when I actually have what will work!} except for the satin blanket binding. Here's my run-down:
½ yard green flannel for the borders
¼ yard light blue for side borders
¾ yard panel
1¾ yards flannel {used in place of batting; fused to Ultra-Cuddle for backing with Mistyfuse for added stability}
1¾ yards Ultra-Cuddle

Total out-of-stash: 5 yards


And because I've had this earworm for about the last four weeks {the first two lines are printed on the panel — in different fonts for each line, I might add}, I'm going to share with you. Bing Crosby's voice is pretty dreamy, if that helps.


So, you see it's all up to you
You can be better than you are
You could be swingin' on a star

Today's post brought to you by:
My 2014 Finishes

Tuesday, March 18, 2014

Apron № 112: Groovy Garden

The earth laughs in flowers. –Ralph Waldo Emerson

After finishing the Honey Bees II apron, I decided I'd better put together an apron I had all cut out and waiting to make for a former co-worker's wedding a couple of years ago. Her husband still works where I do, but he's moving to a new job soon, at a different company. While I still had the serger out, I put together this apron.

She got a yellow KitchenAid stand mixer and those are her kitchen colors {or at least they were when she got married. Does anyone stick with the kitchen colors they picked before they actually set up house?}. I'm not sure why I never got it finished. Ok, well I do. I'm always distracted by something new and shiny and I'd already made about a hundred of these aprons by the time I cut hers out. So it sat until I got my apron making mojo back. I'm not saying that I'm ready to make another hundred aprons. But it was fun to make a couple more.

Today's post brought to you by:
My 2014 Finishes

Monday, March 17, 2014

Apron № 111: Honey Bees II

Behold in spring see everything
Alive and cloth'd with beauty
Shall I alone an idle drone
Be slothful in my duty?
To gather honey see the bee fly
Around from flower to flower
A good example there for me
To well improve each hour.

-Shaker Hymn, derived from a poem by Isaac Watts

A few weeks ago I was contacted by a lady who had seen my Honey Bees Apron and wanted to know if I could make one for her daughter, who is a bee keeper with her grandpa on his farm and whose birthday was coming up.

I wasn't able to find the exact same fabrics, but what I did find was even cuter, I think, than the first apron. Her birthday is today, and I think she looks absolutely adorable in her new apron!

I'd like so send a shout-out to my dad {who is already in bed, I'm sure}. It's his birthday too, today! I love you, dad. I hope you had a great day!

Today's post brought to you by:
My 2014 Finishes

Thursday, March 13, 2014

A Stitch In Time: February Finishes Giveaway Winner

The three great essentials to achieve anything worthwhile are, first, hard work; second, stick-to-itiveness; third, common sense. –Thomas Edison

We're almost mid-way through March and I'm late announcing my own linky party winner. That's how life goes sometimes, and I'm sorry for the delay. Better late than never, right? I've been extra busy lately, but I managed to squeeze in some really cute little totes in February, and I have three finishes under my belt for March already, which I will blog about soon. I've sewed myself out from under any deadlines. It is pretty exciting because now I'm free-sewing, as in, I'm free to sew whatever I want. The possibilities are endless. I have a little project I want to work on over the next week or so and then I'm going to try to catch up on The Princess Bride Quilt-Along.

Speaking of finishes, thank you to everyone who linked this month! Everything was absolutely amazing and it was so much fun to click around and see your projects. Something went awry with Linky Tools in February and all the thumbnails went missing from about October to the last part of February. When I logged in today, I found there was a new option which allowed me to go back in and add thumbnails, so I puttered around with that. There were a few that wouldn't cooperate, but I got thumbnails for almost everything {and they may or may not be the ones you chose; I wasn't an auto-recovery, but I could link a photo from your posts}, which my OCD self is pretty happy about. It is much better than looking at a bunch of blank boxes. LadyBug drew the winner this month and she pulled out #26.

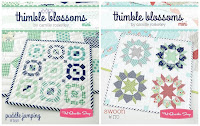
Thimble Blossoms

Congratulations to
:partytime: Mara :partytime:


Mara will receive two adorable mini patterns by Camille Roskelley from Thimble Blossoms, Puddle Jumping and Swoon. Make sure you check out her cute Baby Doll Repair. She also linked some adorable embroidery hoop art. If you haven't visited any of the other finishes for February, take a minute and click on a few. {I suggest Grandmother's Garden by P. and Mrs. DeWitt by Shay. Both quilts were once abandoned Ph.D's, but have finally found their way to the finish line, and beautifully so, I might add!}

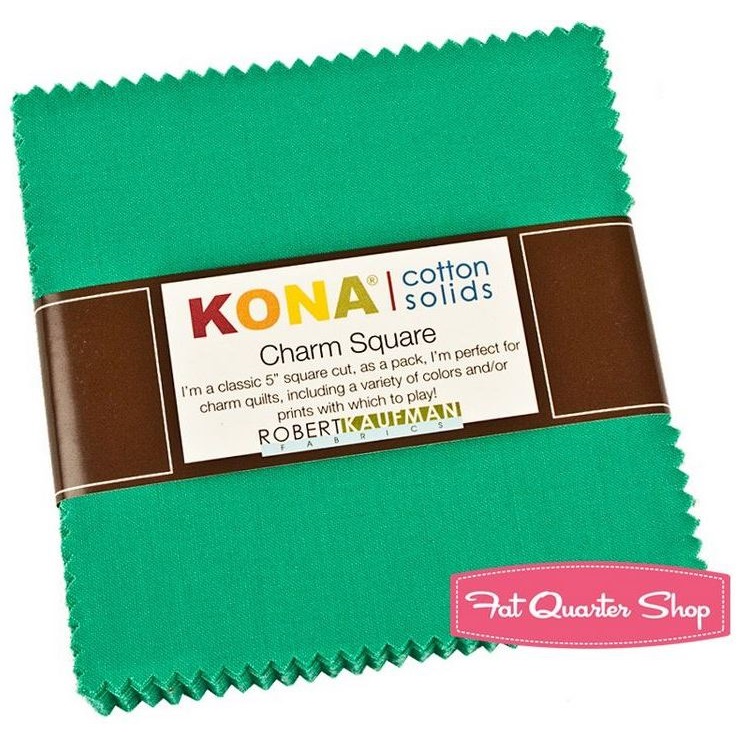
The March Finishes Linky Party is open, so you can link up as you go throughout the month. Remember to include the March Finishes button {code found in the March post} somewhere in any post you link up. Code for a button for your sidebar can also be found at the bottom of the March post. The giveaway this month, sponsored by The Fat Quarter shop, is a charm pack of Kona in Bluegrass.
Kona Bluegrass Charm Pack

Today's post brought to you by:

Sunday, March 2, 2014

Pretty Little {Mia} Maids {and Beehives and Laurels} All In A Row

We are daughters of a Heavenly Father, who loves us. –Young Women theme

Last summer a series of events happened that led me to buy yards and yards of the coordinates in Deena Rutter's Good Life fabric line, which is centered around the Young Women program of the Church of Jesus Christ of Latter-Day Saints. I wasn't directly involved with the Young Women {girls ages 12-18} in our ward, but I had a specific project in mind. It was one of those moments where I followed that little impression without knowing exactly why. I went to a couple of different quilt shops in town and ordered the rest on-line and in the end, had enough fabric to make 54 of those cute little Personal Progress totes. I had several thoughts on what to do with all of those, which included making them for the Not-So-Little Bugs to give as Christmas gifts for cousins, organizing an activity for the Young Women in our ward {congregation} to make them, selling kits on Etsy and selling them ready-made on Etsy. It wasn't something that was pressing, because I always have a zillion things going on. Besides, our Church encourages us to be prepared by storing up food and necessities in case of an emergency. I'm also working on storing up a two-year supply of fabric and projects. I think I'm nearly there.

When I worked on the totes I made as Christmas gifts, I realized that this wasn't really a beginner project. While they are simple and quick to put together, you have to be accurate and pay attention to the details, so contacting the Young Women leaders in the ward and suggesting it as an activity for them kind of fell off the list. But, one of my cute sisters {I have three sisters and they are all very cute} is a leader over the Young Women in her ward and when she saw the totes and that I had a surplus of fabric, she took 15 kits off my hands. Her ward reimbursed me for the cost of the supplies and I volunteered my time to make the embroidered labels for them, because they really do make the totes special. Hers are all finished and handed out to the girls in her ward and I'm hoping to see pictures of them really soon.

That left me with enough fabric for 37 more totes. Still, it wasn't really pressing, except for where to store the fabrics, which were all washed and mostly pressed by now. So, I entertained the idea of selling kits or ready-mades on Etsy again. Sometime. In the future. When I have a few extra minutes.

And then the call came and all the pieces fit together and that little impression to buy a bunch of fabric for no clear end made sense. You see, our Church runs on volunteers. Every position is filled with a volunteer, but not in the sense that you sign up to do what you want. Rather, you are "called" or appointed to do a certain job. You always have the option to say no, if you don't want to do it, but I believe that even if I feel unequal to the task, I will be blessed with the help I need to get the job done. In early January the Bishop {similar to a Pastor or Minister, but again is a volunteer} asked if I would work with the Young Women in the ward as, to use the lingo {we really do have our own vocabulary}, the Young Women President. At the time, I was so excited! Now, I'm mostly just super busy and a little overwhelmed. But I already love the girls so much and am still really excited to be a part of helping them know that God loves them, who they are and what their purpose in life is.

In my spare time, I've been working on birthday gifts for the girls in my ward. Here are eight I finished in February for the February and March birthday girls. {There are nine in the picture, but I switched out the light green ribbon on the one that is grouped together with two others in the middle for an orange ribbon and didn't have individual photos of the other two totes, so, there you are.}

This calling is a lot of work. On a slow week, I only have one extra meeting or activity with the girls. But most weeks there are two or three or four, which explains a little bit of why I haven't blogged much lately. It is taking some getting used to, but as I mentioned, I already love the girls and the six other women who are leaders with me. I am so excited to learn and grow with them. And now that LadyBug has turned 12, she is in Young Women with me. I'm so excited for her! And I'm looking forward to working on my Personal Progress with her. Which means I'd better make a tote for myself, too!

My 2014 Finishes

Saturday, March 1, 2014

A Stitch In Time: March Finishes Linky Party

Do not let what you cannot do interfere with what you can do.
–John R. Wooden


Hi everyone and welcome to the March Finishes Linky Party. Yes, I am still here, just so busy I'm not sure whether I'm coming or going. I had a few finishes in February that I haven't had a chance to blog about yet, but that is coming up. And I'm well on my way to a few more finishes in March. I'm sorry about the thumbnails on the Linky. I guess there was some sort of problem with the hosting center that Linky Tools uses and about 97% of them have gone missing. I think the problem has been fixed. I guess we'll find out! Let the linking begin!

To participate in this month's linky party:
• Your project must be completed sometime in March 2014.
• Once you've got your project finished {as in done, finito, nothing more to add, ready to use/display/give away} with some sort of stitching in it, blog about it or post a photo of it on Flickr.
• Scroll down to see what other bloggers are up to and link to your own finishes.
• Please include the March button in your blog post. Copy the code in the text box below and paste it somewhere in the post you link for this month's finishes. The button is a link to this specific post, so that other bloggers can find their way over and link up too. If you'd like a button for your sidebar, the code is at the bottom of this post.

• Each time you link up a finished project, you're entered to win the March giveaway, a charm pack of Kona in Bluegrass.
Kona Bluegrass Charm Pack

• Thank you to The Fat Quarter Shop for sponsoring our giveaway!


The Fine Print {which might be boring but you really should read}:
• Your project must be completed during the month you are linking to.
• Projects must include stitching of some sort. For example: appliqué, crochet, cross-stitch, embroidery, knitting, practical sewing {garment construction, bags, curtains, etc.}, quilting.
• Projects must be completely finished. As in done, finito, nothing more to add, ready to use/display/give away.
• You can pick something new to do, but projects do not have to be started during the month. If you pick up a UFO, Ph.D, WIP and finish it during the month, it counts.
• Finishes must be completed during this month, but you have until 5:00 pm MST on the 1st of the next month to link your post.
• Post about your finish and then link your specific post {instructions here} above. Links to your blog and not the individual post about your finished project will be deleted.
• Have more than one finish this month? Great! Post about each finish individually and then link the specific posts up separately. Each finish, and therefore each link you add, counts as one entry for this month's giveaway.
• If you've already posted about a finish for this month, there's no need to do a separate post. Just add the button to that post and link up.
• Please copy and paste the code below to include this month's button somewhere in the post {not your sidebar} you link up for this month.
March Finishes

• Don't have a blog? You can link from your flickr account. Just post a picture, include a little note about your finish and a link back here {code included below} in the description. Then join the linky party.

• Want a button for your sidebar? Copy and paste the code below into an HTML gadget for your sidebar. This button is a link to the main A Stitch In Time Linky Party page, which always has the current month's finishes and links to all previous linky parties.
A Stitch In Time Linky Party

• Make sure to visit a few of the other links and leave them some love {ie, a comment}. A good rule of thumb is to visit two links for every one you include.
• Winner of the sponsored giveaway will be drawn randomly from among the links and announced by 8:00 pm MST by the 5th of the following month.
• Kindly consider changing your comment settings to the pop-up window option for faster and easier commenting for visitors to your blog. Instructions can be found here.