Friday, May 31, 2013

Mrs. Potato Head

A skin have I, more eyes than one. I can be very nice when I am done. –A Potato

It's been a really long time since I posted any kind of recipe. It's not that I haven't been cooking. But I posted most of my favorite recipes. Also, I just found that getting good {i.e. appetizing} photos of food to be difficult. And photos to accompany a recipe are kind of a requisite. I mean, isn't it the photo that draws you in and makes you want to try the recipe? Nevertheless, I am posting a couple of recipes today with somewhat non-spectacular photos.

Since I went dairy-free in January of this year, I've been limited in what I can eat. There are milk products in everything from chocolate to taco seasoning to bouillon cubes. It is kind of ridiculous. Over the past several months, I have been relying heavily on Mel's Kitchen Cafe to replace my dairy-laden casseroles. Mel does not use many canned/prepared items {i.e. cream-of-whichever soup} in her recipes, so it is easy to use dairy substitutes. I particularly enjoyed her post on food allergies, during Food Allergy Awareness Week earlier this month.

Today I want to share a couple of potato recipes. Potatoes are a tricky business for dairy-free folks. While they do not contain dairy themselves, they aren't particularly appetizing with out it. Mashed potatoes with almond milk and butter substitute are not bad. As a matter of fact, the Not-So-Little Bugs didn't even notice. But I'm not too fond of the sour cream substitute I've been able to find and wouldn't really like to try it on a baked potato. Whipping up a batch of flavored instant potatoes is out of the question. So, I've been looking for different ways to dress up a potato. Here's what I've come up with.

Garlic & Herb Potatoes
Garlic & Herb Potatoes (with Lamb Shanks)
Photo courtesy of Shay at Quilting In My Pyjamas
8 medium to large red potatoes
1 teaspoon fresh minced rosemary or ¼ teaspoon dried rosemary
1 teaspoon fresh minced thyme or ¼ teaspoon dried thyme
1 teaspoon fresh minced oregano or ¼ teaspoon dried oregano
1 tablespoon fresh minced parsley or 1 teaspoon dried parsley
½ teaspoon salt
⅛ teaspoon pepper
¼ teaspoon paprika
⅛ teaspoon cayenne pepper
2 cloves garlic, minced or pressed
¼ cup olive oil, butter or butter substitute

• Scrub potatoes and dice into ½" - 1" cubes. Fill a 4-quart pot about half-way with water and bring to a boil. When the water reaches a boil, add 1 teaspoon salt and the diced potatoes all at once. Return to a boil and boil potatoes for 5 minutes. Drain potatoes.
• Meanwhile, in a small mixing bowl add rosemary, thyme, oregano, parsley, salt, pepper, paprika, cayenne pepper and garlic to melted butter or olive oil. Toss together with potatoes to coat.
• Place potatoes in a greased 9" x 13" baking dish and place in a 350˚ oven. Bake for 1 hour, stirring every 15 minutes.

Notes:
• For crispy wedges, cut potatoes into wedges rather than dicing them. Combine seasonings as directed and toss with potatoes to coat. Place in a single layer on a baking sheet and bake as directed.
• I've tried this recipe with dried and fresh herbs, as well as russet and red potatoes and it is delicious no matter which way you make it.

Gram's Best Potato Salad
1 dozen eggs
5 lbs. red potatoes

Dressing
2 cups mayonnaise
2 tablespoons sugar
1 tablespoon red wine vinegar
1 tablespoon spicy brown mustard

Additional Ingredients
½ cup pickle juice
1½ cups chopped celery
¼ cup finely diced onion
½ of a dill pickle, finely diced
2 teaspoons salt
2 teaspoons pepper
¼ cup + 2 tablespoons fresh minced parsley or 2 tablespoons dried parsley
Paprika

• Place eggs in the bottom of a 4-quart pot and add cold water to 1" above eggs. Bring to a boil over high heat; cover pot, reduce heat to low and simmer for 5 minutes. Remove from heat and allow eggs to stand in hot water for 10 minutes. Drain water from eggs; fill pot with cold water and ice and allow eggs to cool.
• Peel and slice the boiled eggs; reserve the slices with pretty yellow centers for garnish on top of the potato salad and grate the remaining eggs to be added to the potato salad.
• Scrub and dice potatoes. Fill an 8-quart or 10-quart pot about half-way with water and bring to a boil. When the water reaches a boil, add 1 tablespoon salt and the diced potatoes all at once. Return to a boil and boil potatoes for 10 minutes.
• Meanwhile, to prepare dressing, mix mayonnaise, sugar, red wine vinegar and spicy brown mustard together in a small mixing bowl.
• After the potatoes have boiled for 10 minutes, drain them and transfer to a large mixing bowl. Pour the pickle juice directly on top of the hot potatoes. Add grated eggs, celery, onion, dill pickle, salt, pepper and parsley and stir to combine. Toss together with dressing. Top with sliced eggs and sprinkle with paprika. Refrigerate 6 to 8 hours.

Notes:
• There are no notes, except to say that no picnic is complete without a good potato salad and this is a good potato salad :biggrin:.

Thursday, May 30, 2013

The String Ring Dresden and the Bogart

Bogart: /ˈboʊ gɑrt/ — Slang, Verb:
1. to take an unfair share of something; keep for oneself instead of sharing. Derived, presumably, from actor Humphrey Bogart's tendency to frequently hold a cigarette between his lips or in his hand, but never to actually smoke it.
Noun:
1. a person who hogs or monopolizes something.
2. a magical creature that takes the form of whatever you fear the most.


Once upon a time, P. made a fabulous String Ring Dresden quilt top {String Dresden Tutorial here}. P. does amazing things with fabric. I loved the colors she picked. I even sent her a few fabrics when she put out a call for more strings in those colors, and it was really fun to see them incorporated into her quilt top. So when she said she wasn't going to quilt it herself, but send it off on a fabulous quilting vacation—destination to be determined, I opened my big mouth and told her I had an idea for those fabulous Dresdens.

A few months later, a box arrived at my doorstep, which I resolutely ignored for a good three months. I was absolutely terrified that I would mess up her beautiful quilt top with my poor quilting skills. Eventually, I took a peek at her flimsy {she had it folded right sides together} and was completely amazed by it all over again. Photographs don't quite do quilts justice. From there, I started fleshing out the quilting plan details in the back of my mind, while still ignoring the quilt in its box for a few more months. Sometime around the five month mark, I knew it was time to get going or send the quilt back. I took a deep breath and started quilting. I stitched in the ditch to stabilize the quilt and then did ¼" echo quilting around all the Dresdens, diamonds and border.

Then I started adding some details. I'm not finished yet, but so far, not bad.

What P. doesn't know, is that when I'm finished with this quilt I'm keeping it. I even got her to send me the binding for it. I told her that I like to put the binding on part-way through the quilting process to keep lint from building up on the quilt top from the excess border of batting. It is true, but I told P. that as part of my evil plot to get possession of this super fabulous quilt. And now that it's here, there's pretty much nothing she can do to get it back :mischief:.

Wednesday, May 29, 2013

The Early Bird

The early bird may get the worm, but the second mouse gets the cheese. –Unknown

According to Phineas and Ferb, there are 104 days of summer vacation. The Not-So-Little Bugs say it is more like 77½. Whatever the case, the annual problem is finding a good way to spend those days. We're only mid-way through our first week and I'm running out of ideas.

One of my goals before turning 40 was to learn to love mornings. Mornings have been my arch nemesis for many years. On-again off-again insomnia, pregnancy and having newborns and naughty energetic toddlers who wouldn't stay in bed interrupted my sleep patterns and I never had a pressing need to adjust them back. I grew to love the quiet time at night. I felt my best in the evenings and liked to create at that time of day. But I realized that it might be beneficial to make friends, once again, with the early hours of the day. I made a little progress; if not friends, mornings and I are at least allies. Logically, I know that getting up earlier and getting a jump on the day is less frustrating for me. Physically, by about 9:30 pm my eyelids are drooping and I no longer want to stay up until 1:00 am sewing. But mentally, I miss that quiet time after everyone's gone to bed. And I never spring out of bed bright eyed and bushy tailed when my alarm goes off. As a matter of fact, when my alarm goes off I wonder why it is going off so early. I can't ever think of a reason for it and sometimes sleep until my back-up alarm goes off. It is only once I get up and get moving that I remember why I needed to get up so early. I'm not a very clear thinker while I'm half alseep.

It was with great trepidation, then, that I decided that I would push my alarm time back a full hour so that I could get to work and back before the day has barely begun. There were many factors that went into this decision, but being home for the greater part of the day to help the Not-So-Little Bugs fill their summer vacation weighed in the heaviest. They have lists of chores and suggested activities they have to do, but I just feel like a kid needs his/her mom around during those long, lazy days of summer, to at least try to keep the chaos from getting too out of hand.

Having a day that is heavily weighted during the daylight hours is very interesting. Although I was getting up early enough to shower and get dressed before helping the Not-So-Little Bugs get to school, I also took a little time for myself to read blogs eat a leisurely breakfast, balance my checkbook, or send e-mails, among other things, before I went to work. I've cut all of that out of my routine and I'm out the door with my breakfast in hand before the Not-So-Little Bugs are even awake. When I get home, we have lunch, do our afternoon chores together and by 4:00 in the afternoon I'm wondering what to do with myself.

Getting up at a quarter-to-the-crack-of-dawn is definitely not my favorite thing ever. It requires that I go to bed at 9:00 pm, so that I can toss and turn the requisite 45 minutes before falling asleep. And even with a full eight hours of sleep built into the schedule, I still wonder why in the world my alarm is going off so early. I've discovered something interesting, though. The world is just as quiet in the early morning as it is late at night. The difference for me is momentum. At the end of the day I'm already moving, so it is easier to keep on moving. In the morning, I'm at a dead standstill and it is harder to get that momentum.

Perhaps if I keep plugging away at it, I'll get the hang of mornings. In the meantime, I'm going to see if I can figure out how to get my iPhone to play a few get-up-and-go tunes instead of an alarm in the mornings. And I'll keep looking for things to add to my list of fun {free} things to do during summer vacation. Maybe that will help me get rid of the earworm I've had since last Friday.

Tuesday, May 28, 2013

Inchworm

Inchworm, inchworm
Measuring the marigolds
You and your arithmetic
You'll probably go far

Two and two are four
Four and four are eight
Eight and eight are sixteen
Sixteen and sixteen are thirty-two

–Frank Loesser

Over the last 22 months, Grasshopper has grown like a weed. A very tall, skinny weed. It is impossible to keep him in pants. Right now, he's wearing size 18 slim, with an adjustable waistband from the boys' department, but he's almost too tall for those. I'm not sure where I'm going to find him jeans that are 24”W x 34” L. I've looked on-line, and some sites say they carry that size, but when I click on the link to order them, they are sold out. The closest I've found in stock are Levi's Shrink-to-Fit 501's, but even after a good shrinking, the waist will still be about 2” too large. At $45 a pair, and with only a general estimate of actual shrinkage, I haven't been willing to chance it yet, especially since as the length increases, so does the waist size.

Now that Grasshopper has grown taller than his mother {he's got a good 2” on me}, we thought it was about time to let him do a few important grown-up things, like riding shotgun. And mowing the lawn.

He's still perfecting his technique, especially with the edging. But with a few more months' practice, I'm sure he'll get there.

Now, if I can just keep him in pants we'll be all set.

Monday, May 20, 2013

Gilbert's Grape Ultra-Mini Star Quilt, Amish Style

Becky: I love the sky. It's so limitless.
Gilbert: It is big. It's very big.
Becky: Big doesn't even sum it up, right? That word big is so small.
What's Eating Gilbert Grape, 1993

This is my adorable LadyBug. As part of their U.S. studies, the 5th graders at LadyBug's elementary school are assigned a project on one of the states. The project is done in partners and includes a poster with details about the state and a float that represents that state. LadyBug was assigned to a team of three. She and the other girl in their group put the float together and the third man on their team did the poster. When Grasshopper was in the 5th grade, he also had to do a float {he had Tennessee, if you were wondering}, so we recycled the base for LadyBug's project {there's no sense in wasting good fringe, right?} and they stripped it down to the basic elements. Then LadyBug and her partner reinvented the float. I'm not sure how they got anything done, because I didn't hear a peep out of either one of the girls while they were here, but somehow, it came together really well. They painted the base green {like grass} and added the state seal and state quarter for Pennsylvania. LadyBug's partner supplied the Amish LEGO barn, and together they put together the little LEGO Hershey's factory workers and the state abbreviation {PA, seen in reverse behind the state seal because it is facing backwards} in LEGOs.

And then I butted right in and made a tiny quilt to go on the float. I had exactly eight - 1” HST's left from the label on Miss Butterfly's Zig-Zag quilt, and from that a star was born. The finished quilt is 4¾-ish”, and is hand quilted because that's how the Amish would do it. I'm not showing you the back though. A few stitches in, I realized that I could make teeny, tiny, ultra-mini stitches, or I could quilt it the right way. I picked the ultra-mini stitches.

After LadyBug's assignment was finished, she gave the quilt to her {stuffed} pet lizard, Gilbert.

Gilbert has a spot on LadyBug's bed and every night, she tucks him in before she gets tucked in herself. Until Gilbert got his new quilt, he was sleeping under an eyeglass lens cleaning cloth. Doesn't he look cozy?

Today's post brought to you by:
My 2013 Finishes

Friday, May 17, 2013

Blogger's Quilt Festival: Pinkalicious

Pink isn't just a color, it's an attitude! –Miley Cyrus

Welcome Blogger's Quilt Festival visitors! I'm really excited that Amy is allowing two entries this time, in separate categories. You can see my first post here. And I'm really excited to share this second quilt with you {or, again for those of you who've been reading for a while}. It was such fun quilt to put together.

Blogger’s Quilt Festival Stats
Quilt Name: Pinkalicious
Finished quilt measures: 48” x 48”
Special techniques used: non-traditional backing {Ultra Cuddle} and binding {Satin Blanket Binding}
Quilted by: Me
Blogger's Quilt Festival Category: Baby Quilt

I made this quilt as a gift for my sister's new baby girl last fall.

I enjoyed rummaging through my stash and pulling out the prettiest pink fabrics, in every shade imaginable, for this quilt. In addition, I included nine chocolate brown squares, all the same fabric, with pretty pink tulips on them. Those blocks I gathered on two edges, giving them a little bit of a ruffled 3-dimensional aspect. The blocks are 4” and the sashing and corner stones are 1”.

I used Ultra Cuddle for the back, which is soft like Minky, but fuzzy on both sides. Rather than putting batting in the middle of the quilt sandwich, because the Ultra Cuddle has quite a bit of loft on its own, I used a layer of white flannel. As I worked with the quilt, and had some issues with puckers on the back {which required unpicking}, I decided that if I ever used Ultra-Cuddle or Minky on the back of a quilt again, I would fuse my layer of flannel to the Ultra-Cuddle or Minky to give it a little bit more stability. I actually did make this same quilt again, only in blues, for a friend a few months later and used Mistyfuse between the flannel and Ultra Cuddle that time. I noticed a big improvement and will definitely do it that way in the future. I absolutely love the texture of the Ultra Cuddle on the back of the quilt, and baby blankets pretty much require Satin Blanket Binding. It is slippery and that in combination with the nap on the Ultra Cuddle require lots of pinning, but I think the results are worth it.

I quilted “cat's eyes” {I call it that because it reminds me of a cat's eye marble} and “roses” in each block. I embroidered a label with the baby's name {redacted for security purposes}, birth day, weight, length and time on it.

Thank you for taking the time to stop by and have a look. You can read my original post on this quilt here.

Today's post brought to you by:
AmysCreativeSide.com

Blogger's Quilt Festival: Echoes of Eternity

Time is too slow for those who wait, too swift for those who fear, too long for those who grieve, too short for those who rejoice, but for those who love, time is eternity. –Henry Van Dyke

Welcome to those stopping by for the Blogger's Quilt Festival {and thanks to those of you who've been hanging around for a while}! The Blogger's Quilt Festival is always so much fun. I mean, how could it not be? It's got “festival” right in the name. Thank you to Amy for hosting and to her sponsors for the fun prizes! I'm really excited to share this quilt with you. I love that two entries are allowed this time, in two separate categories. You can see my second entry here.

I made this quilt as a wedding gift for the daughter of a very special friend. This young woman often babysat my children and it was a blessing to be able to get to know her. She is a wonderful example of love, service and kindness and so I wanted to do something special for her when she was married earlier this year. I used her wedding colors and made this double wedding ring for her to hang on her wall.

Blogger’s Quilt Festival Stats
Quilt Name: Echoes of Eternity
Finished quilt measures: 19½” x 19½”
Special techniques used: Curved Piecing, Templates
Quilted by: Me
Blogger's Quilt Festival Category: Art Quilt


I included this note with the gift: The wedding ring pattern, which has no beginning or end, symbolizes eternity. The purple center circle represents the responsibility a husband and wife have to strengthen and protect each other and their family. The green circles, of which you can only see part, represent the ways a family can branch out from the home by showing love and service to others. The flower represents the constant care and nourishment a marriage needs and the beautiful thing it can be when each partner gives 100% to their spouse and the marriage. The interlocking circle pattern symbolizes that each marriage partner and their choices are individual and unique but are intertwined in the lives of those around them. The square frame that cuts off the pattern, which is shabby and worn but still beautiful, alludes to the fact that life, though sometimes difficult, is only a small portion in our eternal existence. The pattern of the quilt continues well beyond the boundaries of the frame and it could possibly go on forever much in the same way that our lives on earth are only a small part of our existence.

I gave myself only three weeks, from start to finish, to have this project ready in time for the wedding. I planned to have it custom framed in a shadow box, every framer I talked to said it would take two weeks. I barely finished the piecing and quilting in those three weeks and wasn't sure what I was going to do about a frame. Discouraged, I almost gave up, but I found a frame that was the right size, removed the artwork that was already in it, painted and distressed it and pulled it all off just in time.


I knew the frame needed something. I mulled over paint options for several days before I finally settled on one. I was worried that a true white would be too much white but felt the dark frame, as it was, would overpower the quilt. I considered metallic and crackle paints, but in the end, I went with a slightly-off-white paint and I'm glad I did. I think it is the perfect color. I really love how the distressing highlights the pretty pattern in the frame and lets a little bit of the dark paint show through.


To mark my quilting design, I used blue painter's tape. I made a paper template for the pattern in the center, cut it out, traced it onto the tape and then cut it out with an Xact-O knife. I used a walking foot for most of the quilting because I knew it would give me the best chance for even stitches and straight lines. I only used a free-motion foot for the feathers in the purple blocks where the arcs intersect and for line of circles in the arcs. I also used the painter's tape and a couple of circle punches to mark those for quilting. And I used Stampin' Up!®'s Crystal Effects {works better than E6000} and a lot of patience to attach the cyrstals. It is mounted on foam core board and the quilt itself, which is just the pieced top and a layer of batting, wraps around to the back of the foam core board and is pinned in place with tiny sequin pins. The inner dimension of the frame is 19½” square.


This was a fun project. You can read more about it here:
Fabric selection and project deadline
Quilting in progress
The finished product

Today's post brought to you by:
AmysCreativeSide.com

Thursday, May 16, 2013

Folded Fabric Star: Tote Bag Edition

Though my soul may set in darkness,
It will rise in perfect light,
I have loved the stars too fondly
To be fearful of the night.
–Sarah Williams

Once upon a time, I saw a really cool folded fabric star. And so, of course, I had to make my own.

I went to the tutorial, decided I was definitely not going to make a pot holder, got my fabrics ready and made a tote bag. Geta deserves the credit for the tote bag idea. I made the straps nice and long so that I could comfortably put it over my shoulder and not have the bag hitting me just under the armpit.

I had most of this bag finished before I dropped Grace off for her three-week spa vacation on April 10th. As a matter of fact, on the day I took her in I only needed to put on the binding around the top of the bag, but didn't dare take the time to do it for fear of missing the repair man's pick-up time {which is not an exact time; just whenever he gets to the shop on that particular Wednesday} and have to wait another week. By the time I got Grace back on May 3rd, I'd moved on to other things and this bag sat for another couple of weeks. Sometime very early this week, or maybe even late last week, I lost my mojo. I got kind of worried there for a bit, when my funk lasted for more than a day or two and my desire to sew completely vanished. I picked this back up with the hope that doing something easy that would lead to a quick finish would put me back in my groove. It didn't really. I finished this several days ago and wasn't super excited about it. Eventually my mojo came back all on its own, though, and I am really happy with how it turned out.

The red center of the star isn't quite large enough. While I actually did read through the directions, when it came time to place the fabrics, I just looked at the pictures and missed the part about moving the second fabric ½” down from the first and leaving ¼” between fabrics after that. But there was no way I was unpicking. Next time I'll remember. And there probably will be a next time because I need a cool tote bag for church. I added an extra color, using nine fabrics instead of just eight. To compensate, I increased the base fabric and the width of the fabric rectangles by ½”. I'm pretty happy with how it turned out. I kept the quilting simple. Actually, I just copied the quilting in the tutorial, not wanting to distract from the star of the show, the folded fabric star. And I didn't think the bag itself needed anything fancy, either. I just did straight lines on the front and diamonds, or intersecting lines at a 45˚ angle on the sides and back.

I'm using this as my “go bag” for hand sewing projects. I almost always take a little something to work on when I know I'm going to be sitting and waiting, like at the doctor's office or the driver license division or a book signing. I've been using ziplock bags, which keep the project clean, but they're a little tricky to juggle when the waiting stops and the business to attend to commences. I'll keep my Stitchy Kit inside it all the time, and I'll probably still use ziplock bags to hold my projects, but I'll slip those inside the tote bag when it is time to go. Functional and fabulous, no?

Today's post brought to you by:
Show Off Friday at Pieceful Life

My 2013 Finishes

Tuesday, May 14, 2013

More Piano Guys

Were it not for music, we might in these days say, the Beautiful is dead. –Benjamin Disraeli

Saturday night we, the Not-So-Little Bugs, Mr. Bug and I, had the wonderful opportunity to attend a concert by The Piano Guys. They are a favorite at our house. We saw them in concert a little over a year ago, and when I saw their tour schedule had a stop in Salt Lake City, I jumped at the chance to see them again.

The hall was at capacity and as expected, it was a wonderful concert. One of the highlights for me was when Steven Sharp Nelson, the cello player, invited his wife on stage and they performed together. She played the violin and he played the guitar. {He also plays the violin, piano and kick drum. Whaddaya know?} The piece is Ashokan Farewell.


Other highlights include Jon Schmidt's daughter performance in the choir, which sang Simple Gifts during their Somewhere Over the Rainbow/Simple Gifts mash-up. And Alex Boyé performed Peponi with them.

It was nearly 2½ hours of pure musical enjoyment.

And here's another amazing Piano Guys video.

Monday, May 13, 2013

Quilter's Favorites

The fact that I can plant a seed and it becomes a flower, share a bit of knowledge and it becomes another's, smile at someone and receive a smile in return, are to me continual spiritual exercises. –Leo F. Buscaglia

Geta, over at Geta's Quilting Studio has put together a really fun linky party where you share what you know about quilting. She's put together a list of questions, which you can answer in a post of your own and then link the post on her Quilter's Favorites page. After you've linked, you can click around the blogosphere and see what other quilters have to share. You can answer as many or as few questions as you like, illustrate with photos and links, and have a good time getting to know other quilters.


Before I answer a few of Geta's questions, I would like to welcome new visitors and thank you for stopping by! I have been sewing for 30+ years {I started with doll clothes when I was about 8} and love it. I have two great children, a wonderful husband and besides sewing and quilting, I like to listen to beautiful music, cook, read and garden. And now, on to the question and answer session.

List a few of your favorite quilting notions.
Spray Starch: I love Magic Sizing, which is inexpensive and does a great job. I also really love homemade Magic Starch.
Small Cutting Mat: I like to keep a small cutting mat next to my machine for squaring up blocks and paper piecing.
Small Ruler: A small cutting mat requires a small ruler. I love the Omnigrid 4" x 8" ruler. It has ⅛" markings and is great for squaring up and paper piecing.

Some thoughts about thread:
I love Gütterman 50-weight 100% cotton thread for piecing and AURIfil Makò 50-weight 100% cotton thread for quilting. AURIfil is magical. It becomes a part of the quilt, rather than just lying on top. And it has a pretty shine to it. Red Rock Threads has all the colors available, the best prices I've found and great shipping rates. {And, no, I'm not being paid by AURIfil or Red Rock Threads to endorse them, but I wouldn't say no if they wanted to give me free stuff :lol:.}

Some thoughts about batting:
I love Warm 'n Natural. It is 100% cotton and I like the way it quilts up. You can hand wash and machine dry the batting before quilting to shrink it, which I love {instructions on the packaging}.

Share some tips for easy piecing.
My biggest recommendation is to machine wash & dry and press fabrics with starch {see notes above} before beginning any project. Cut carefully, using the ruler to measure rather than the grid on your cutting mat. Use an accurate ¼" seam, press at every step and square up blocks, as needed.

Some machine quilting tips:
When I took art classes in Jr. High and High School, the teachers always required thumbnail sketches as part of the assignment. I never really got it until I started quilting. My best quilting friend is my pencil and paper. I sketch out designs for almost every quilt I make; both the layout of the blocks and the machine quilting I'm going to put into it. This is a thumbnail sketch for a Pinwheel Sampler quilt I finished last year:

Not only did I sketch out a basic map for the entire quilt, I did individual sketches for each block. The sketches for the individual blocks were larger and allowed me room to include all exact details, while the sketch for the whole quilt helped me to balance out the quilting so I didn't have two blocks next to each other with too similar of quilting. I don't always stick to my sketches. Sometimes a block needs something different when you get to it, but having an idea to start with is always helpful for me.

In addition to doodling on paper, I usually warm up on a practice quilt sandwich made from scraps of batting and muslin, to make sure the quilting comes out how I want it to.

Do you have free tutorials on your blog?
My tutorials include Continuous Bias Binding from start to finish, Pillowcases, FMQ Swirls, Paper Piecing, and a Scrappy Snowball Quilt, among others. All my tutorials can be found here.

Share one of your favorite quilts made by you.
Picking a favorite quilt is like picking a favorite child. I just can't. But you can visit my quilts here.

Do you have a favorite on-line quilt shop?
I love Mary Jo's Cloth Store. They have a huge collection of quilting fabrics and their prices are really great!

Friday, May 10, 2013

Some Assembly Required

It's not the load that breaks you down, it's the way you carry it.
–Lou Holtz
10 yards of fabric
cut to
252 – 2” Squares
504 – 1½” x 2½” Rectangles
1,260 – 1½” Squares
1,044 Triangles

A little over four weeks ago I dropped Grace off at the Babylock dealer where I bought her for a routine physical. And they happily told me they'd give her a good work-over and have her back to me in three or four weeks. When I got home, I got busy preparing for Grace's return. I pressed open about 600 half-square triangles and unpicked about 300 more, making 600 orphaned triangles. Then I cut buddies for them so they could become half-square triangles again and put them all away in a drawer to wait patiently and dust-free, until I got my machine back.

After that, I started cutting fabrics for another quilt that has been kicking around since late 2007. At least. I pieced triangles {which are actually star points} together here and there until I finally couldn't stand it and chain-pieced the rest together one day a few months ago while I was procrastinating quilting the Zig-Zag quilt. 1,044 triangles showing here:

This quilt started out as four blue fabrics from the Toile Christmas fabric line by Moda. I came upon them at my mom's LQS and stood in the store coming up with a plan to use these fabrics in a quilt for LadyBug's bed so that I could buy them. I was going to make a quilt of maple leaves. Blue maple leaves. I still don't know what I was thinking :confused:
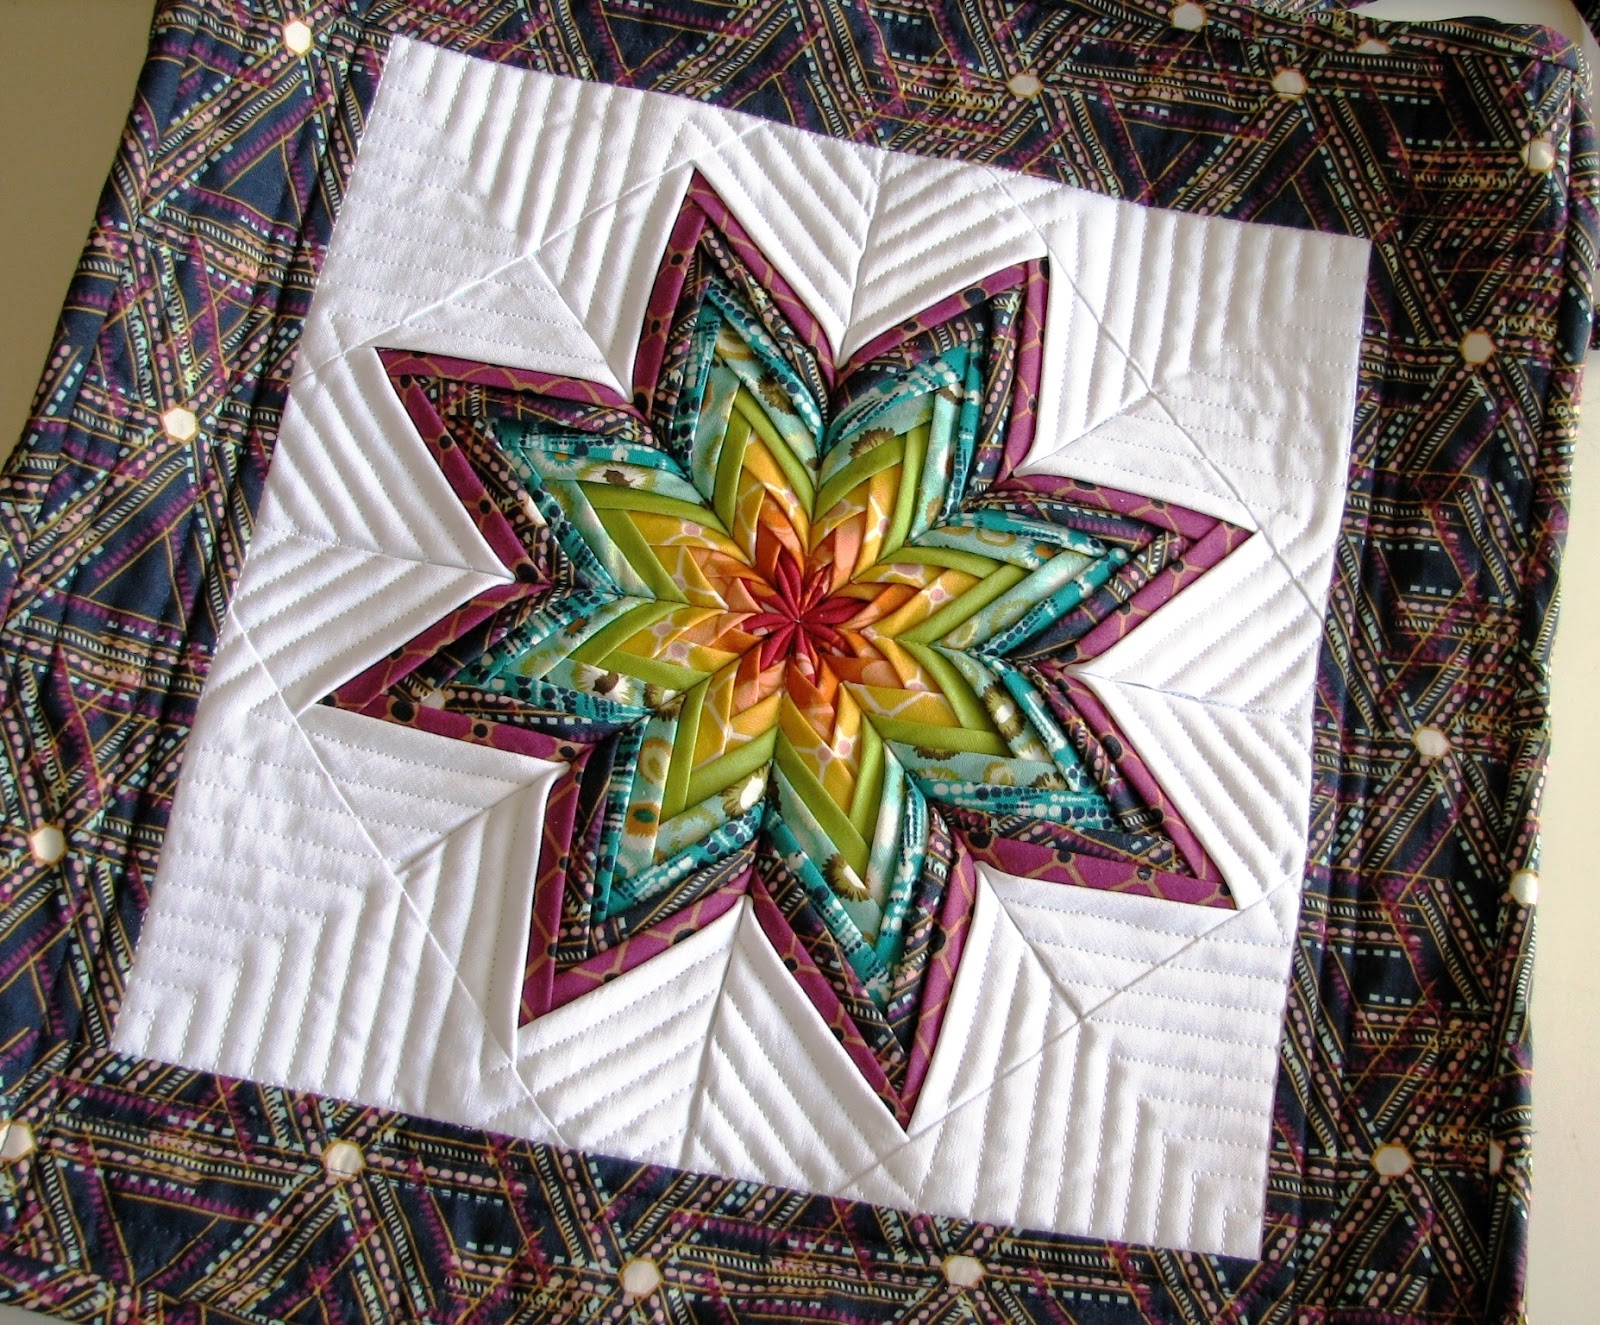
, except that I love maple leaves. And this pretty blue fabric.

One day, six or so months later, I came across the instructions for a Checkerblock Star by Marcia over at The Quilter's Cache. And I decided that the blue fabrics would be way more cool in a quilt of Checkerblock Stars.

The only problem was that I didn't have enough of my four Toile Christmas blues to make a whole quilt. 60% of the fabric gets pulled into seam allowances. Enough time had passed that the fabric was all sold out so I visited every quilt shop along a 100-mile stretch of I-15 {which runs North and South through Utah & Nevada. And maybe Idaho.} looking for blues to match those four shades of Toile Chirstmas. Matching the exact tone of these blues was tricky, but in the end I pulled together something passable.

At the time, my eyes had not been opened to the beauty of scrappy quilts and the picture in my head for this quilt was for a smooth, subtle and uniform flow of shades. I was reluctant to break up my original four fabrics and add other fabrics to the mix to give me enough for the quilt I wanted to make. Since then, I've come to love scrappy quilts, but I still waver between thinking this particular scrap quilt is going to be really great and a great big mess. Trying to make this work with four shades of the same color in a single fabric line is a little bit tricky. Trying to make it work with those same four shades but in a of a bunch of different fabrics {34, to be precise} is a little bit crazy.

--

Last Tuesday night, I had all my fabrics cut to finish the rest of this quilt. I was pretty sure that Grace would be ready for me to pick her up on Wednesday, because Wednesdays are pick-up and delivery days for the repair man. Also, three weeks was plenty of time for him to give her a tune-up. By noon on Wednesday, I was too anxious to wait any longer for a call from the shop. I called them, but she was not back yet. I guess she'd heard that I had big plans for her and wanted another week off. Reluctantly, I made a mental list of projects that did not require a machine and worked on a hand sewing project that evening.

On Thursday after work I was sitting at the stop sign on the corner down the street from my house, when the shop called to say my machine was in. I banged my head on the steering wheel several times because if they'd have called just 15 minutes earlier, I could have picked Grace up on my way home. The shop is two blocks from where I work {sidebar: on really frustrating work days, I fantasize about walking down the street and escaping in the bolts of fabric}. On Friday, I actually did leave work in the middle of the day and picked up my machine. And then I pretended I was an adult and went back to work. When I got home on Friday afternoon, Grace and I got right to work.

These are the center sections of each Checkerblock Star; 252 – 2” squares, sewn into 63 – four-patches. I used my Go! cutter and the 2" square die, but there was a little distortion because I tried cutting too many layers at a time. I was about a hundred squares in when I decided that I'd better not try to cut six layers of fabric all at once. They are kind of a mess. Not a single one of them measures the 3½” they should. I'm trying to decide if I should fudge it in the seam allowance when I put the blocks together, or if I should unpick them and sew them back together with a scant scant ¼” seam. If I had any fabric left, I think I would probably start from scratch, but that's not an option.

I strip pieced the rest. These are the outer edges and corners of the blocks, 252 – 1½” squares and 504 – 1½” x 2½” rectangles. Half of the rectangles were pieced to squares and the other half will be added to four-patches made from the remaining 1½” squares. I've only got a few strips left to cut.

These are the rest of the 1½” squares {in the rough}. 1,008 of them. They need cutting into 504 pairs and then sewing into 252 four-patches.

Did your eyes glaze over a little at all of those numbers? Mine did at the thought of all the cutting and piecing left to do. I might go back to piecing here and there again, and wrap this up in another 5 years or so. Eventually, all these pieces will become a twin-size quilt, finishing at 72” x 90”. In all, there are 3060 pieces, which includes a border using the triangle blocks.

The math is a little bit boring, and sometimes mind boggling, but I kind of like knowing what sort of dragon I've got to slay. It is highly satisfying to come out on the other side of a project this big and not just see, but know exactly how much work went into it.

I just wish there were some way to measure how many yards of thread I'm using.

Thursday, May 2, 2013

A Stitch In Time: April Finishes Giveaway Winner

The road to success is always under construction. –Lily Tomlin

Thank you to everyone who linked up in April. I really enjoyed looking at all the fun finishes that were linked up this month. I'm excited to announce our winner, drawn by Grasshopper. He picked #6.
Avalong by Fig Tree Quilts


Congratulations to
:partytime: Lee :partytime:


Lee will receive a charm pack of Avalon by Fig Tree Quilts from The Fat Quarter Shop! Make sure you click on over and see Lee's beautiful postage stamp quilt. It is amazing! And if you haven't already, check out a few of the other finishes this month. There were so many fun projects finished in April!

The May Finishes Linky Party is open, so you can link up as you go throughout the month. Remember to include the May Finishes button {code found in the May post} somewhere in any post you link up. Code for a button for your sidebar can also be found at the bottom of the May post. The giveaway is a $15 gift certificate from our sponsor, The Fat Quarter Shop. Make sure you click on over and see what's coming soon!

Today's post brought to you by:

Wednesday, May 1, 2013

A Stitch In Time: May Finishes Linky Party

No matter how many goals you have achieved, you must set your sights on a higher one. –Jessica Savitch

I'd like to send a huge thank you to everyone who linked up in April! I so enjoyed clicking on over to see what you've been up to and if you haven't gotten a comment from me yet, you will soon :wink:. I had two finishes in April, and since I can't very well enter my own giveaway by linking them up, I'll just give you links to them here, because this is the place we get to show off our accomplishments, right? I made a new ironing board cover and I finished a Zig-Zag quilt for my niece. I am working towards a couple of finishes in May, too. And I can't wait to see all the fun projects that you finish up and link this month. I am inspired by your creativity! I can't believe it is May already. I say that every month, but I honestly don't know where the time goes. In any case, let the linking begin!

To participate in this month's linky party:
• Your project must be completed sometime in May, 2013.
• Once you've got your project finished {as in done, finito, nothing more to add, ready to use/display/give away} with some sort of stitching in it and blog about it or post a photo of it on Flickr.
• Scroll down to see what other bloggers are up to and link to your own finishes.
• Please include the May button in your blog post. Copy the code in the text box below and paste it somewhere in the post you link for this month's finishes. The button is a link to this specific post, so that other bloggers can find their way over and link up too. If you'd like a button for your sidebar, the code is at the bottom of this post.


• Each time you link up a finished project, you're entered to win the May giveaway, a $15 gift certificate from The Fat Quarter Shop! Make sure to click on over and see what is coming soon!

• Thank you to The Fat Quarter Shop for sponsoring our giveaway!


The Fine Print {which might be boring but you really should read}:
• Your project must be completed during the month you are linking to.
• Projects must include stitching of some sort. For example: appliqué, crochet, cross-stitch, embroidery, knitting, practical sewing {garment construction, bags, curtains, etc.}, quilting.
• Projects must be completely finished. As in done, finito, nothing more to add, ready to use/display/give away.
• You can pick something new to do, but projects do not have to be started during the month. If you pick up a UFO, Ph.D, WIP and finish it during the month, it counts.
• Finishes must be completed during this month, but you have until noon MST on the 1st of the next month to link your post.
• Post about your finish and then link your specific post {instructions here} above. Links to your blog and not the individual post about your finished project will be deleted.
• Have more than one finish this month? Great! Post about each finish individually and then link the specific posts up separately. Each finish, and therefore each link you add, counts as one entry for this month's giveaway.
• If you've already posted about a finish for this month, there's no need to do a separate post. Just add the button to that post and link up.
• Please copy and paste the code below to include this month's button somewhere in the post {not your sidebar} you link up for this month .

May Finishes

• Don't have a blog? You can link from your flickr account. Just post a picture, include a little note about your finish and a link back here {code included below} in the description. Then join the linky party.


• Want a button for your sidebar? Copy and paste the code below into an HTML gadget for your sidebar. This button is a link to the main A Stitch In Time Linky Party page, which always has the current month's finishes and links to all previous linky parties.

A Stitch In Time Linky Party

• Make sure to visit a few of the other links and leave them some love {ie, a comment}. A good rule of thumb is to visit two links for every one you include.
• Winner of the sponsored giveaway will be drawn randomly from among the links and announced by 8:00 pm MST on the 3rd of the following month.
• Instructions for making an index page to your finishes can be found here.
• Kindly consider changing your comment settings to the pop-up window option for faster and easier commenting for visitors to your blog. Instructions can be found here.